This post created by Lolly Jane was sponsored by Martinelli’s. It was originally published on Lolly Jane on April 24, 2017.
One thing I love about living on acreage is listening to the birds. Sometimes their songs are sweet and simple, other times we can hear a mama bird screeching at her babies, probably warning them about the neighborhood owls that live in our 30′ trees out front. We showed how to make a kid friendly, toilet paper bird feeder before but wanted to share a long lasting feeder as well. Our kids were bummed when the other one deteriorated over time. This new one is sturdy and long lasting, and matches our colorful house which is a bonus in my eyes! Plus, we’re recycling glass bottles which is environmentally friendly so it’s a win all around.
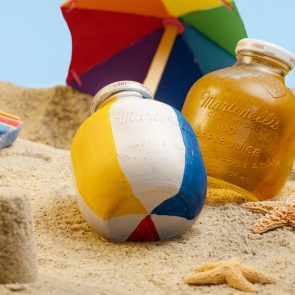
We altered Kristen’s wine bottle bird feeder tutorial, shortening some steps and creating a faster way to secure the bottle without too much effort. And we’re using a Martinelli’s glass bottle since we go through them often enough around here.
Here are the simple supplies you’ll need to create your own Martinelli’s glass bottle bird feeder. There are 3 sizes of wood total, be sure to use the cut key to keep track of your steps.
- One 1/2″ x 2″ x 3′ poplar
- One 1/4″ x 5 1/2″ x 2′ alder hobby board
- One 1/2 x 2″ x 2′ pine
- hose clamp
- Martinelli’s bottle (11 inches long)
- 4″ mending plate
- Phillips screwdriver
- Miter saw
- Wood glue or brad nailer
- Wallpaper (optional)
- Paint or stain (optional)
Cut List:
Two 1×2 @ 11″ poplar >>> 45* cuts on each end
Two 1×2 @ 5 1/2″ poplar
One 1×2 @ 4 7/16″ poplar
Two 3 1/2″ x 6″ pine >>>roof: 45* angles, opposing ends
One 16″ alder
One 5 1/2″ x 5 1/2″ alder
Here is your cut list key. Dry fit your pieces together to double check your measurements. (Note that we accidentally flipped our #1 pieces backward below; in the final product, they’re correctly facing outward.)

We drew our pitch out first to accomodate our Martinelli’s botttle, it ended up being 16″ tall.
To dress the backside of the feeder up (and because ours in under the porch eaves and won’t be getting wet), we covered it in leftover floral wallpaper.

We love this $3 trick we learned over the summer. Instead of trying to punch a hole through a metal clamp like we did for our bathroom mason jar storage, we simply used a mending plate to hold the clamp in place. After attaching it to the wood, use a phillips head screwdriver to loosen and tighten the clamp, easy.
Paint or stain the remainder of your pieces. We went with white acrylic paint for our sides and base.
To assemble, we started by nailing the roof together.
We then nailed the roof to the floral base, then nailed the sides in place and worked our way down from there.

Here is our wood bird feeder all assembled and ready to hang!

We screwed a pop tab into the back of ours and hung it with a screw onto my front porch pole.
To fill up your Martinelli’s bottle, unscrew the clamp with your phillips screwdriver. Tighten to secure it back in place then enjoy the birds up close and personal while you gaze from your porch swing.

Post a Comment